Quick answer: the main types of makeup brushes are for foundation, concealer, powder, blush, contour, highlighter, eyeshadow (flat and blending), brows/liner and lips. Five brushes are enough to start; with ten you can do any everyday look. Synthetic bristles are best for creams and liquids, and weekly cleaning prevents irritation and keeps the finish smooth.
In self-makeup classes, the most common question is not about products — it is "which brush do I use for this?". Many people buy a 24-piece set and use three. Understanding the types of makeup brushes by shape and bristle saves money and changes the result more than switching foundations.
In this guide you will see what each brush is for, how to choose the bristle, the essential kit and how to look after it.
How do shape and bristle define a brush’s job?
Every brush is a combination of three variables:
- Shape: flat, angled, rounded, tongue-shaped (flat with a rounded tip) or fan.
- Density: tightly packed bristles deposit more product and give coverage; loose bristles spread and diffuse.
- Bristle type: synthetic or natural.
The practical rule: dense brush = coverage; loose brush = diffusion. A dense brush with foundation covers blemishes; a loose brush with blush creates a soft, diffused flush.
Synthetic or natural bristles?
| Synthetic | Natural | |
|---|---|---|
| Best for | Liquids and creams (foundation, concealer, cream blush) | Powders (powder, blush, eyeshadow) |
| Product absorption | Low | Higher |
| Washing and drying | Quick | Slower |
| Durability | High | Depends on care |
| Sensitive skin | Usually better tolerated | May irritate some people |
Today, good-quality synthetic fibres also work very well with powder, which makes a 100% synthetic kit a practical choice for beginners.
What is each type of makeup brush for?
Skin
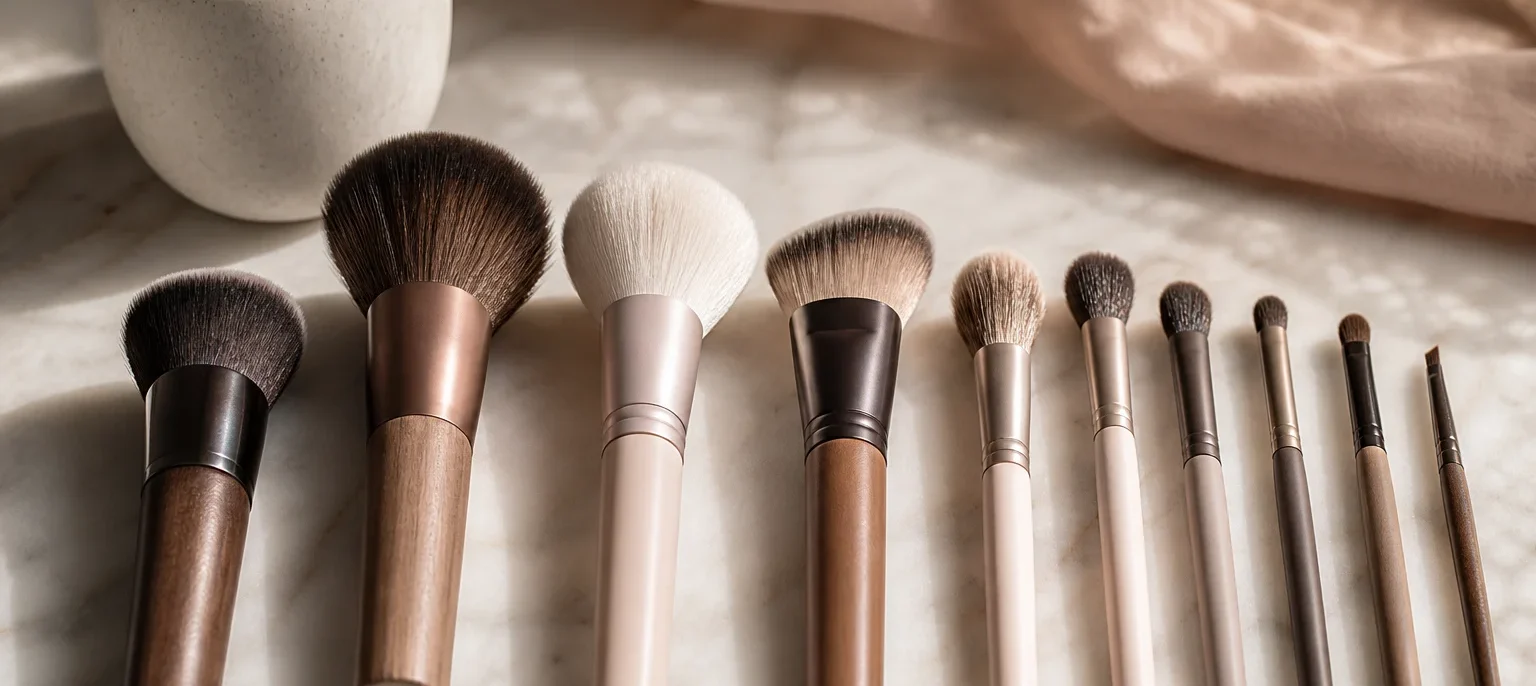
- Foundation brush: flat and dense (a flat-top kabuki) or tongue-shaped. Spreads foundation in circular or stippling motions.
- Concealer brush: small, tongue-shaped or dense and rounded, for dark circles and spot blemishes.
- Powder brush: large, rounded and soft. Deposits loose or pressed powder without heaviness.
- Blush brush: medium, rounded or slightly angled. Apply on the apples of the cheeks, blending towards the temple.
- Contour brush: angled and dense, to draw shadow below the cheekbone and along the jaw.
- Highlighter brush: small and loose or fan-shaped, for the high points of the face.
Eyes
- Flat shadow brush: deposits colour on the mobile lid.
- Blending brush: rounded and loose, flame-shaped. It is the most important eye brush: it removes harsh edges.
- Small blending or pencil brush: dense and pointed, for the outer crease and the lower lash line.
- Thin angled brush: for brows (with powder or pomade) and gel liner.
Lips
- Lip brush: small and firm, to outline and fill precisely. Useful with dark and long-wear lipsticks.
What is the essential brush kit?
You do not need a 30-piece case. A lean kit covers the routine:
Minimum kit (5 brushes):
- foundation;
- powder or blush (a medium rounded brush does both);
- angled contour;
- eye blending brush;
- thin angled brush for brows and liner.
Complete kit (10 brushes): the five above plus concealer, highlighter, flat shadow, small blending and lip.
If you already have the basic products, see the order to apply each one in the 10-minute self-makeup routine.
Brush, sponge or fingers: when to use each?
The three applicators all have a place in the routine, and combining them often gives the best result:
| Applicator | Finish | Best for | Watch out |
|---|---|---|---|
| Brush | More coverage with less product | Foundation, powder, contour, eyeshadow | Needs frequent cleaning |
| Damp sponge | Natural, "real skin" | Blending foundation and concealer | Absorbs product; replace every 3 months |
| Fingers | Melted, warmed by the skin | Cream blush and highlighter, cream shadow | Always clean hands |
A simple strategy: spread foundation with the brush and press lightly with a damp sponge to blend. On rushed days, cream blush with your fingers takes 30 seconds.
How do you choose a good brush in the shop?
A few quick tests help separate a brush that will last from one that sheds on the first wash:
- Tug the bristles gently. If hairs come out, pass.
- Sweep it on the back of your hand. The bristles should feel soft, with no scratchy tips.
- Check the ferrule (the metal part that holds the bristles): it must be firm, with no play on the handle.
- Check the shape. A blending brush should spring back to its flame shape after pressing.
- Buy individually the brushes you use most, rather than a large set of uneven quality.
How do you use brushes to flatter your face shape?
A brush is also a visagism tool. Contour and blush change how proportions read:
- Round face: contour on a diagonal, from the ear towards the corner of the mouth, and blush swept upwards.
- Long face: blush placed horizontally on the apples, light contour on the forehead and chin.
- Square face: soft contour on the corners of the jaw and rounded blush.
If you do not know your shape, take the test in how to find your face shape.
How do you clean makeup brushes?
A dirty brush collects product, sebum, dead skin cells and microorganisms. The result is a patchy finish and, on sensitive or acne-prone skin, irritation. The US FDA advises against sharing eye cosmetics and recommends keeping applicators clean to reduce the risk of infection.
How often to clean
- Foundation, concealer and creams: 1 time a week.
- Powder, blush and eyeshadow: every 2 weeks.
- Professional brushes: after every client.
Step by step
- Wet only the bristles in lukewarm water, tip pointing down — water in the handle loosens the glue.
- Use a gentle soap or mild shampoo and swirl in the palm of your hand.
- Rinse until the water runs clear.
- Squeeze out the excess with a towel and reshape the bristles with your fingers.
- Dry flat or upside down, never upright, for about 8 to 12 hours.
How long does a brush last?
A good synthetic brush, well cared for, lasts several years. Store brushes upright in a cup once they are fully dry, or in a case with separate slots, so the bristles do not bend. Replace it when the bristles start to shed, splay or lose their shape, or when it still smells after washing.
Common brush mistakes
- Using the same brush for foundation and powder without washing — the powder cakes;
- Pressing the brush into the skin: the tips of the bristles do the work;
- Storing damp brushes in a closed case, which encourages fungi;
- Buying by the number of pieces instead of by function.
Frequently asked questions
Five brushes are enough for a complete look: one for foundation, one for powder or blush, an angled brush for contour, a blending brush for eyeshadow and a thin angled brush for brows and liner. A 10-brush kit adds concealer, highlighter, flat shadow, lip and fan brushes.
Synthetic bristles are best for creams and liquids (foundation, concealer, cream blush), are easier to wash and absorb less product. Natural bristles work well with powders but need more care and can irritate sensitive skin.
As a reference, foundation, concealer and cream brushes every week; powder and eyeshadow brushes every 2 weeks. If you have acne or sensitive skin, wash them more often.
Yes. A damp sponge gives a more natural finish and absorbs some product; a brush gives more coverage with less foundation. Many people use both: the brush to spread and the sponge to blend.

Learn to use each brush in practice
Knowing a brush’s name is half the job; the other half is your hand. In the Self-Makeup Class, a 3-hour hands-on session, you learn skin prep, a work look, a smoky eye and highlighter with your own products and brushes — and leave knowing what is worth buying and what you can skip.
Want to understand how make-up, hair and colour work with your face? The Visagism Consultation provides that complete reading.
Nelma Faleiro holds degrees in Visagism and Hair Therapy Technology and in Aesthetics and Cosmetics from Anhembi Morumbi University, where she taught for 10 years.